
Table of Contents
Introduction
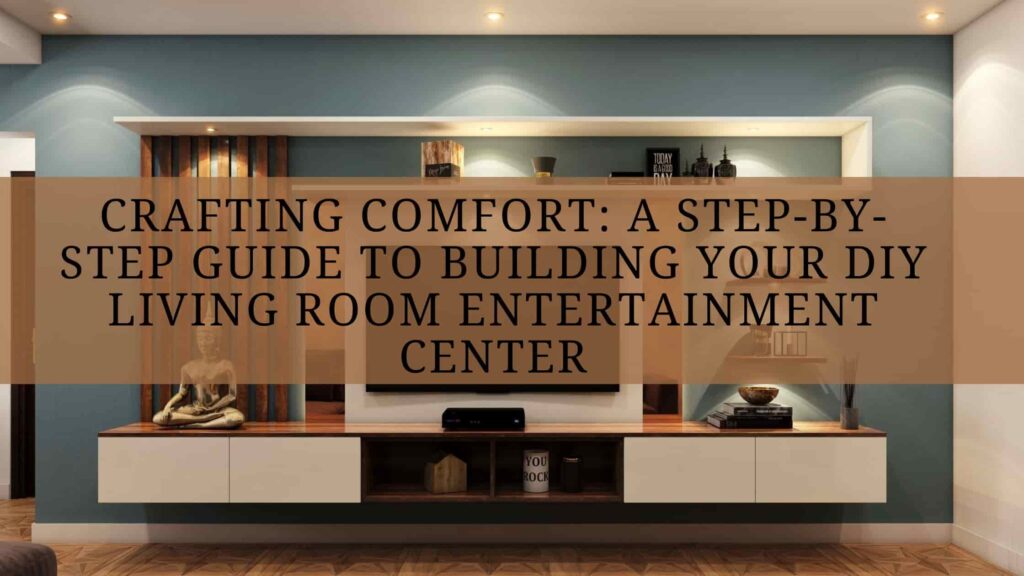
In the ever-evolving realm of home decor, the DIY living room entertainment center stands out as a beacon of personalization and functionality. This comprehensive guide will walk you through the process of creating a bespoke entertainment hub that not only caters to your aesthetic preferences but also elevates your living space to new heights.
Design Inspiration:
Styles:
Showcase different aesthetic styles such as modern, rustic, minimalist, industrial, or traditional. Include images or descriptions that capture the essence of each style.
Explain the key features and characteristics of each style, helping readers identify which style resonates with their personal taste.
Materials:DIY Living Room Entertainment Center
Highlight a range of materials that can be used in constructing an entertainment center. This could include wood, metal, glass, or a combination of materials.
Discuss the visual and practical aspects of each material, such as the warmth of wood, the sleekness of glass, or the durability of metal.
Configurations:
Explore different layouts and configurations for entertainment centers. This could include wall-mounted units, free-standing cabinets, built-ins, or modular systems.DIY Living Room Entertainment Center
Discuss the advantages and considerations for each configuration, considering factors like room size, available wall space, and the need for storage.
Innovative Features:
Showcase innovative design features that can be incorporated, such as hidden compartments, sliding panels, adjustable shelving, or integrated lighting.
Explain how these features not only add functionality but also contribute to the overall design aesthetic.
Customization Options:
Emphasize the importance of customization. Encourage readers to personalize their entertainment centers based on their specific needs and preferences.DIY Living Room Entertainment Center
Provide examples of how individuals can customize finishes, colors, hardware, and overall design elements to make the project uniquely theirs.
Budget-Friendly Ideas:
Include design inspirations that cater to different budget constraints. Showcase projects that demonstrate creativity in achieving an attractive and functional entertainment center without breaking the bank.
Space Optimization Tips:
Compact Designs:
Discuss the benefits of choosing furniture and design elements that are inherently space-efficient. This could involve selecting streamlined sofas, compact coffee tables, or nesting furniture that can be easily stored when not in use.
Provide examples of furniture pieces with built-in storage to help reduce clutter and keep the living room organized.
Wall-Mounted Options:DIY Living Room Entertainment Center
Encourage the use of wall-mounted furniture to free up floor space. This might include wall-mounted shelves, cabinets, or entertainment centers.
Explain how wall-mounted options not only create a more open and airy feel but also provide opportunities for creative design and display.
Multi-Functional Features:
Highlight the versatility of furniture with multi-functional features. For instance, a sofa bed or a coffee table with storage can serve dual purposes, optimizing space for different needs.
Showcase examples of furniture that can adapt to various functions, such as a dining table that can be transformed into a workspace.
Modular and Flexible Furniture:DIY Living Room Entertainment Center
Introduce the concept of modular furniture that can be rearranged to suit different occasions. Modular sofas, for example, allow for flexible seating arrangements.
Discuss the advantages of furniture that can be easily moved around, providing adaptability to changing needs or social situations.
Smart Storage Solutions:
Offer tips on utilizing smart storage solutions to keep the living room organized. This could involve using storage ottomans, under-sofa storage, or wall-mounted storage systems.
Provide guidance on decluttering and maintaining a minimalist approach to prevent the space from feeling cramped.
Lighting Strategies:
Discuss the role of lighting in creating the illusion of space. Suggest the use of wall sconces or pendant lights instead of floor lamps to save floor space.
Explain how strategic lighting can enhance the perceived size and atmosphere of the living room.
Reflective Surfaces:DIY Living Room Entertainment Center
Introduce the idea of incorporating mirrors or other reflective surfaces to create the illusion of a larger space. Mirrors can reflect light and make the room feel more open.
Provide examples of how mirrored furniture or decor elements can be used effectively.
Material Selection Guide:
Types of Wood:DIY Living Room Entertainment Center
Pros:
Hardwoods (e.g., oak, maple, walnut): Known for durability and a rich, natural aesthetic.
Plywood: Offers stability and is often more affordable than solid wood.
MDF (Medium-Density Fiberboard): Smooth surface, less prone to warping, and cost-effective.
Cons:
Hardwoods: Can be more expensive, may require additional finishing.
Plywood: Outer layers may have visible seams.
MDF: Less resistant to moisture than solid wood.
Types of Metal:DIY Living Room Entertainment Center
Pros:
Steel: Sturdy and modern, can be used for structural elements.
Aluminum: Lightweight, resistant to corrosion, and versatile.
Iron: Durable and offers a classic aesthetic.
Cons:
Steel: Can be heavy and may rust without proper treatment.
Aluminum: May scratch easily.
Iron: Prone to rust if not properly maintained.
Finishes:DIY Living Room Entertainment Center
Pros:
Stained Finish: Enhances the natural beauty of wood, various colors available.
Painted Finish: Provides a customizable look, hides imperfections.
Veneer Finish: Mimics the appearance of solid wood at a lower cost.
Cons:
Stained Finish: May show scratches and wear over time.
Painted Finish: Prone to chipping and may require touch-ups.
Veneer Finish: Thinner surface, limited in terms of refinishing.
Considerations for Each Room:DIY Living Room Entertainment Center
Discuss how the material choices might be influenced by the room’s environment. For example, moisture-resistant materials may be important in a basement or a room with fluctuating humidity.
Budget Considerations:
Emphasize the importance of aligning material choices with budget constraints. Provide options for high-end, mid-range, and budget-friendly materials.
Durability and Maintenance:
Explain the durability of each material and the maintenance required. For example, some finishes may be more resistant to stains, while others might require regular polishing.
Compatibility with Electronics:
Consider the compatibility of materials with electronics. For instance, proper ventilation may be crucial if the entertainment center will house electronic components that generate heat.
Environmental Impact:
Address eco-friendly options and considerations for readers who prioritize sustainable materials.
Step-by-Step Building Guide:DIY Living Room Entertainment Center
Plywood or MDF sheets
Hardwood boards for framing
Screws
Wood glue
Wood dowels
Sandpaper
Stain or paint (optional)
Varnish or sealant (optional)
Cabinet hardware (handles, knobs, hinges)
Tools: Circular saw, drill, screwdriver, doweling jig, clamps, measuring tape, level, paintbrush or stain applicator.
Step 1: Planning and Design
Materials Needed:DIY Living Room Entertainment Center
Before starting, carefully plan the design of your entertainment center. Consider the dimensions based on your room’s space and the size of your electronics. Create a detailed sketch or use design software to visualize the final product.
Step 2: Cut the Plywood
Using a circular saw, cut the plywood or MDF sheets into the necessary pieces according to your design. This typically includes panels for the sides, top, bottom, shelves, and any doors or drawers.
Step 3: Frame Construction
Build the frame using hardwood boards. This frame will provide structural support for the entertainment center. Cut the boards to the appropriate lengths and assemble them using wood glue and screws. Use a level to ensure the frame is square.
Step 4: Attach Plywood Panels
Attach the cut plywood panels to the frame using screws. For a seamless look, use wood glue along the edges before screwing them in. This forms the basic structure of your entertainment center.
Step 5: Add Shelves and Dividers
Install shelves and dividers inside the cabinet space. Measure and cut the shelves to fit precisely. Secure them in place with screws or dowels. Adjust the height of shelves to accommodate your electronics and other items.
Step 6: Sanding and Finishing
Smooth any rough edges with sandpaper. If desired, stain or paint the entertainment center for a finished look. Allow the finish to dry completely before moving on to the next step.
Step 7: Hardware Installation
Attach cabinet hardware, including handles, knobs, and hinges, according to your design. Make sure all doors and drawers align properly. Double-check the functionality of any moving parts.
Step 8: Mounting (if applicable)
If your design includes a wall-mounted entertainment center, use appropriate hardware to securely attach it to the wall. Ensure that it is level and stable.
Step 9: Cable Management
Consider adding cable management features, such as drilled holes or channels, to keep wires organized and hidden behind the entertainment center.
Step 10: Final Inspection
Carefully inspect the entire entertainment center for any loose screws, rough edges, or imperfections. Make any necessary adjustments or additions.
Congratulations! You’ve now completed your DIY entertainment center. Enjoy organizing your media equipment and decorating the shelves to suit your personal style.
Budget-Friendly Options:DIY Living Room Entertainment Center
Affordable Materials:
Suggest using budget-friendly materials such as plywood, MDF, or particle board instead of expensive hardwoods. These materials can still provide a polished look when finished correctly.
Explore local lumber yards or home improvement stores for discounted or leftover materials, which can significantly reduce costs.
Thrifted or Repurposed Furniture:DIY Living Room Entertainment Center
Encourage readers to consider repurposing or upcycling old furniture into an entertainment center. Thrift stores, garage sales, or online marketplaces can be excellent sources for finding affordable pieces that can be transformed with a bit of creativity.
DIY Finishes:
Share cost-effective finishing options, such as using paint instead of expensive stains. Paint can provide a fresh and modern look while being more forgiving on budget constraints.
Explore DIY distressing techniques or creative paint patterns to add a unique touch without additional costs.
Simple Design with Fewer Features:
Simplify the design to reduce material and labor costs. A straightforward, minimalist design can still be stylish and functional.
Consider omitting complex features like intricate molding or elaborate hardware, focusing on the essentials to keep costs down.
Ready-to-Assemble (RTA) Furniture:DIY Living Room Entertainment Center
Explore ready-to-assemble furniture options available at affordable prices. These kits often include all necessary materials and instructions, saving time and effort in the planning and cutting stages.
Use Basic Tools:
Recommend the use of basic tools that are more budget-friendly, such as hand saws, manual screwdrivers, and affordable clamps.
Highlight the fact that many DIY projects can be accomplished with a limited set of tools, reducing the overall investment.
Shop Smart for Hardware:DIY Living Room Entertainment Center
Find budget-friendly hardware options for handles, knobs, and hinges. Discount or bulk hardware stores, as well as online marketplaces, can offer affordable choices.
Consider alternatives like repurposing old hardware or exploring DIY solutions for decorative elements.
DIY Assembly:
Emphasize the cost savings associated with assembling the entertainment center independently. DIY assembly not only saves money on labor but also allows for a greater sense of accomplishment.
Prioritize Functionality:
Focus on the essential features that fulfill the primary purpose of the entertainment center. This avoids unnecessary complexities and costs associated with elaborate designs.
Local Resources:
Direct readers to local resources, such as community workshops, where they may have access to tools and materials at reduced costs. Some places offer workshops or tool-sharing programs.DIY Living Room Entertainment Center
Integrated Technology Solutions:
Cable Management:
Concealed Channels: Design the entertainment center with concealed channels or cable management systems to hide and organize cables. This can involve creating openings or pathways within the structure for cables to run through discreetly.
Built-in Cable Organizers: Incorporate built-in cable organizers or clips to secure cables along the back of the entertainment center. Velcro straps or cable ties can also be useful for bundling and organizing cords.
Ventilation for Electronics:
Built-in Ventilation Holes: Ensure proper ventilation for electronic devices by incorporating strategically placed ventilation holes or grilles. This is especially important for audio-visual equipment, gaming consoles, and other electronics that generate heat during operation.DIY Living Room Entertainment Center
Open Back Design: Consider an open back design or perforated panels to promote airflow. This design not only aids in cooling but also allows for easy access to cable connections.DIY Living Room Entertainment Center
Hidden Storage for Devices:
Adjustable Shelves: Design adjustable shelves within the entertainment center to accommodate various-sized devices. This flexibility allows users to customize the space based on their equipment.
Concealed Compartments: Integrate concealed compartments or cabinets to hide electronic devices when not in use. This not only reduces visual clutter but also adds an element of sleekness to the design.
Remote-Friendly Materials: If the entertainment center will house devices that use remote controls, choose materials that allow signals to pass through. This ensures that users can control their devices even when they are hidden from view.
Smart Power Solutions:
Built-in Power Strips: Install built-in power strips or outlets within the entertainment center to provide convenient and organized power sources for multiple devices.
USB Ports: Consider integrating USB ports into the design for easy charging of smartphones, tablets, and other USB-powered devices.
Wireless Technology Integration:DIY Living Room Entertainment Center
Wireless Charging Stations: Include wireless charging stations for compatible devices. This eliminates the need for additional cables and provides a convenient charging solution.DIY Living Room Entertainment Center
Bluetooth Connectivity: If applicable, consider incorporating Bluetooth connectivity or other wireless technologies for seamless integration with audio devices.
Accessibility for Maintenance:
Removable Panels: Design the entertainment center with removable panels or access points for easy maintenance and cable adjustments. This ensures that users can access and manage their electronics without difficulty.
Future-Proofing:DIY Living Room Entertainment Center
Modular Design: Consider a modular design that allows for easy updates and adjustments as technology evolves. This ensures that the entertainment center remains relevant and functional over time.
Upcycling Furniture:DIY Living Room Entertainment Center
Upcycling is a sustainable and creative approach to furniture design. Rather than discarding old furniture, which contributes to waste, upcycling transforms it into something new and useful. This process not only reduces environmental impact but also allows individuals to express their creativity and customize their living spaces. In the context of creating an entertainment center, upcycling provides an opportunity to repurpose furniture pieces that might otherwise be overlooked or discarded.
Creative Ideas for Upcycling Furniture into an Entertainment Center:
Dresser Transformation:DIY Living Room Entertainment Center
- Remove Drawers: Take an old dresser and remove some or all of the drawers.
- Open Shelves: Replace the drawers with open shelves to accommodate media equipment.
- Paint or Refinish: Give the dresser a fresh coat of paint or refinish it to match your decor.
- Hardware Upgrade: Consider updating the hardware, such as handles or knobs, for a modern touch.
Bookshelf Makeover:
- Adjust Shelf Heights: Modify a bookshelf by adjusting the heights of the shelves to fit various electronic components.
- Add Backing: Attach a backing or use wallpaper to add a decorative touch to the back of the bookshelf.
- Cable Management: Incorporate cable management solutions by drilling holes in the back of the bookshelf to keep wires organized.DIY Living Room Entertainment Center
- Paint or Stain: Give the bookshelf a new look with paint or stain that complements your style.
Cabinet Conversion:
- Remove Doors: Take the doors off an old cabinet to create an open shelving unit.
- Paint or Distress: Paint the cabinet in a color of your choice or distress it for a rustic look.
- Glass Panel Addition: Replace door panels with glass for a sophisticated touch, allowing remote controls to function even with the doors closed.
- Use Drawers for Storage: If the cabinet has drawers, repurpose them for additional storage.
Mix and Match Pieces:
- Combine Different Furniture: Get creative by combining various pieces of furniture, such as using a dresser as the base and a bookshelf on top.DIY Living Room Entertainment Center
- Unified Finish: Ensure a cohesive look by painting or finishing all pieces in a unified color or theme.
- Create a Feature Wall: Arrange different pieces to create a feature wall, turning the entertainment center into a focal point of the room.
Repurposed Trunks or Chests:
- Lift for TV Stand: Use an old trunk or chest as a unique TV stand.
- Storage Inside: Utilize the inside of the trunk for additional storage of DVDs, cables, or gaming consoles.
- Decorative Touch: Add decorative elements such as stencils or decals to enhance the visual appeal.
Customization and Personalization:
Customization and personalization allow individuals to transform their entertainment center into a unique and meaningful piece that reflects their personality and complements the overall aesthetics of their living space. Rather than settling for a generic design, customization empowers individuals to make intentional choices that contribute to the visual appeal and functionality of the entertainment center. By considering paint colors, hardware options, and decorative elements, owners can create a piece that stands out and feels like a natural extension of their personal style.DIY Living Room Entertainment Center
Customization Elements:
Paint Colors:
- Expressive Palette: Encourage individuals to choose paint colors that resonate with their style. Whether it’s bold and vibrant or subtle and neutral, the color palette sets the tone for the entire piece.
- Accent Colors: Suggest incorporating accent colors for certain elements, such as the back panel, shelves, or trim, to add visual interest.DIY Living Room Entertainment Center
- Harmony with Décor: Consider the existing color scheme of the room to ensure the entertainment center harmonizes with its surroundings.
Hardware Choices:
- Style and Finish: Highlight the importance of selecting hardware that complements the overall design aesthetic. Whether it’s sleek and modern, rustic and distressed, or classic and ornate, hardware can significantly impact the appearance of the entertainment center.DIY Living Room Entertainment Center
- Unified Design: Encourage a unified hardware design throughout the piece to maintain consistency.
- Functionality: Consider the functional aspects of hardware, such as handles, knobs, or hinges, ensuring they are not only visually appealing but also practical for daily use.
Decorative Elements:
- Molding and Trim: Explore the use of molding and trim to add architectural interest to the entertainment center. Crown molding, baseboards, or decorative trim can elevate the overall design.
- Decals or Stencils: Suggest using decals or stencils to add patterns, quotes, or artistic elements. This allows for a personalized touch without the need for intricate hand-painting.
- Integrated Lighting: Consider incorporating integrated LED lighting or other lighting elements to highlight certain features or create a cozy ambiance.
- Display Areas: Designate specific areas for displaying personal items, such as photos, artwork, or collectibles, to infuse the entertainment center with individuality.DIY Living Room Entertainment Center
Importance of Personalization:
Express Individual Style:
Personalizing the entertainment center allows individuals to showcase their unique style and preferences. It becomes a statement piece that reflects their taste and personality.DIY Living Room Entertainment Center
Enhance Aesthetics:
By choosing specific colors, hardware, and decorative elements, owners can enhance the overall aesthetics of the entertainment center, ensuring it seamlessly integrates into their home décor.DIY Living Room Entertainment Center
Create a Connection:
Customization fosters a sense of connection between the owner and the piece. The entertainment center becomes more than just furniture; it becomes a meaningful part of their living space.
Tailor to Room Dynamics:
Considering the existing design elements of the room ensures that the entertainment center fits cohesively within its surroundings, creating a harmonious and visually appealing environment.DIY Living Room Entertainment Center
Gaming Console Setup:
Gaming console setups often involve a variety of equipment, including consoles, controllers, headsets, and other accessories. A well-organized and visually appealing entertainment center can greatly enhance the gaming experience. This blog post aims to provide gamers with practical tips and creative ideas for organizing and displaying their gaming gear within the entertainment center.
Dedicated Console Shelves:
- Explanation: Designate specific shelves or compartments within the entertainment center to house gaming consoles. This ensures a centralized and organized setup.DIY Living Room Entertainment Center
- Tip: Consider adjustable shelves to accommodate different console sizes and future upgrades.
Cable Management Solutions:
- Explanation: Address the issue of cable clutter by incorporating cable management solutions. This not only enhances the aesthetics but also makes it easier to access and connect gaming consoles.
- Tip: Use cable ties, clips, or built-in cable channels to keep cords tidy and prevent tangling.
Controller Display and Storage:
- Explanation: Showcase controllers in an organized and accessible manner. Whether it’s on dedicated hooks, controller stands, or integrated compartments, having a designated spot for controllers adds a stylish touch.
- Tip: Explore controller charging stations that also serve as display stands.
Gaming Headset Stations:
- Explanation: Devote a space for gaming headsets to keep them within reach yet neatly stored when not in use.
- Tip: Consider wall-mounted or hook solutions to hang headsets, preventing clutter on surfaces.
Ventilation for Consoles:
- Explanation: Ensure proper ventilation for gaming consoles to prevent overheating. This may involve incorporating ventilation holes or open-back design.
- Tip: Place consoles with built-in fans in well-ventilated areas to optimize cooling.
Backlit Shelves or LED Strips:DIY Living Room Entertainment Center
- Explanation: Add a visually striking element with backlit shelves or LED strips. This not only creates an immersive gaming atmosphere but also highlights the gaming setup.
- Tip: Choose customizable LED strips to match the gaming ambiance or room decor.
Gaming Merchandise and Collectibles:
- Explanation: Incorporate shelves or display areas for gaming merchandise, collectibles, or themed decor items to personalize the gaming space.
- Tip: Arrange merchandise creatively to add a personalized touch to the gaming environment.
Storage for Game Cases and Accessories:
- Explanation: Provide storage solutions for game cases, additional accessories, and peripherals. This ensures a clutter-free environment and easy access to gaming essentials.
- Tip: Use bins, baskets, or drawers within the entertainment center to organize games and accessories.
Multi-Functional Furniture:
- Explanation: Consider multi-functional furniture pieces that serve both gaming and storage purposes. For example, an ottoman with built-in storage can house gaming accessories while providing additional seating.
- Tip: Explore furniture with hidden compartments for a sleek and minimalist look.
Personalized Gaming Zone:
- Explanation: Create a dedicated gaming zone within the entertainment center. This may involve designing a specific section or incorporating themed elements that enhance the gaming experience.
- Tip: Personalize the gaming zone with posters, artwork, or decals related to favorite games or genres.
Floating Shelves and Display Areas:
Floating shelves are wall-mounted structures that create the illusion of “floating” on the wall without visible brackets or supports. They are an excellent addition to an entertainment center as they not only provide a practical solution for storage but also offer an opportunity to showcase decorative items, books, or media collections in a visually appealing way. This design choice contributes to a more open and airy feel while adding a personalized touch to the entertainment center.
Key Elements to Showcase:
Decorative Display:
- Explanation: Floating shelves are ideal for showcasing decorative items such as vases, sculptures, or framed photos. They act as dedicated spaces to display personal touches that enhance the overall aesthetics of the entertainment center.
- Design Tip: Arrange decorative items in groups of varying heights and sizes for a visually interesting display.
Book Display:
- Explanation: Floating shelves can serve as stylish bookshelves, providing a space to organize and display books. This not only adds a literary element but also contributes to the overall design of the entertainment center.
- Design Tip: Mix books with decorative items to create a balanced and curated look.
Media Collections:
- Explanation: Use floating shelves to display media collections, such as DVDs, Blu-rays, or video games. This makes it easy to access and visually organize entertainment options.
Design Tip: Arrange media collections categorically or by color to create an organized and cohesive display.
Integration with Entertainment Center:
- Explanation: Incorporate floating shelves seamlessly into the entertainment center design by placing them strategically around other elements, such as the TV or main console. This creates a cohesive and integrated look.
- Design Tip: Align the placement of floating shelves with the overall layout of the entertainment center to maintain visual harmony.
Functional Storage:
- Explanation: While floating shelves serve as display areas, they also offer functional storage. Use them to store smaller items like remotes, gaming controllers, or audiovisual accessories in decorative baskets or bins.
- Design Tip: Choose floating shelves with varying depths to accommodate different-sized items.
Lighting Considerations:
- Explanation: Pay attention to the visual weight and balance of floating shelves. Distribute items evenly and consider the overall symmetry and proportion within the entertainment center.
- Design Tip: Mix open shelves with closed cabinets for a balanced look and concealed storage.
DIY Floating Shelf Projects:
- Explanation: Enhance the display on floating shelves with strategic lighting. Consider incorporating LED strip lights or small spotlights to highlight featured items.
- Design Tip: Ensure the lighting complements the overall ambiance of the room and does not create glare on screens.
Balancing Visual Weight:
- Explanation: For a more personalized touch, consider DIY floating shelf projects. This allows individuals to customize the size, shape, and finish of the shelves to match their specific design preferences.
- Design Tip: Experiment with different materials, such as reclaimed wood or painted MDF, for a unique and custom look.
Maintenance and Care:
Regular maintenance ensures that your entertainment center remains in good condition, both aesthetically and functionally. Taking proactive steps to clean and care for the furniture not only preserves its original appearance but also extends its lifespan. Proper maintenance involves a combination of routine cleaning, preventive measures, and addressing specific materials used in the entertainment center.
Best Practices for Maintenance and Care:
Dusting and Cleaning:
- Explanation: Dusting is a fundamental part of maintaining an entertainment center. Regularly dust all surfaces, including shelves, cabinets, and electronic equipment.
Best Practices:
- Use a microfiber cloth to capture dust without scratching the surfaces.
- Avoid abrasive cleaners, as they can damage finishes.
- For stubborn dust, slightly dampen the cloth with water.
Cleaning Glass Surfaces:
- Explanation: If your entertainment center includes glass components, such as doors or shelves, proper cleaning is essential for clarity and visual appeal.
Best Practices:
- Use a glass cleaner or a mixture of vinegar and water for streak-free cleaning.
- Wipe with a lint-free or microfiber cloth to avoid leaving residue.
Wood and Veneer Care:
- Explanation: Wood and veneer surfaces require special attention to maintain their appearance and prevent damage.
Best Practices:
- Dust regularly to prevent particles from scratching the surface.
- Use a mild, wood-friendly cleaner for deeper cleaning.
- Apply furniture polish or wax occasionally to protect and enhance the wood.
Metal Hardware:
- Explanation: If your entertainment center features metal hardware, such as handles or knobs, it’s essential to prevent tarnish or corrosion.
Best Practices:
- Clean metal hardware with a soft, damp cloth.
- Dry thoroughly to prevent water spots.
- Apply metal polish if necessary, following product instructions.
Cable Management:
- Explanation: Address cable management to maintain a tidy and organized appearance.
Best Practices:
- Regularly check and organize cables to prevent tangling.
- Use cable ties or clips to secure and route cables neatly.
- Consider using cable organizers or covers for a streamlined look.
Ventilation and Electronics:
- Explanation: If your entertainment center houses electronics, proper ventilation is crucial to prevent overheating.
Best Practices:
- Ensure that ventilation openings are free from dust and obstructions.
- Dust electronic components using compressed air to prevent buildup.
Preventing Sun Damage:
- Explanation: Protect your entertainment center from sun damage, which can cause fading and discoloration.
Best Practices:
- Position the furniture away from direct sunlight.
- Use curtains or blinds to limit sun exposure during peak hours.
Avoiding Harsh Cleaning Agents:
- Explanation: Harsh cleaning agents can damage finishes and materials used in the entertainment center.
Best Practices:
- Avoid using strong chemicals, bleach, or ammonia-based cleaners.
- Read and follow the manufacturer’s cleaning recommendations.
FAQ
What makes a DIY living room entertainment center unique?
A DIY living room entertainment center is unique because it allows individuals to personalize their furniture according to their style and needs. Unlike store-bought options, DIY projects provide creative freedom in design, materials, and finishes.
How should I plan my DIY entertainment center project?
Start by assessing your living room space, considering dimensions and existing furniture placement. Plan the layout of your entertainment center, keeping in mind the integration of multimedia elements. This initial planning ensures a seamless fit within your living space.
What materials are best for a DIY entertainment center?
Solid wood, such as oak or maple, adds a timeless appeal to your DIY project. If on a budget, engineered wood is a viable alternative without compromising on style. The choice depends on your budget, preferences, and desired aesthetic.
Why is precision crucial when building the frame?
Precision is crucial to ensure the frame accommodates your media equipment seamlessly. Measurements should be accurate to avoid issues during construction. A sturdy frame forms the foundation of your DIY entertainment center, contributing to its overall durability.
How can I maximize storage in my DIY entertainment center?
Craft custom shelving units for DVDs, gaming controllers, and accessories. Consider concealed storage behind stylish cabinet doors for a clutter-free appearance. Cable management systems further enhance the visual appeal, keeping wires organized.
What finishes can I use to add a personal touch?
Experiment with stains, paints, or distressed looks to add a personal touch to your DIY creation. Personalize hardware, such as knobs and handles, to align with your design aesthetic. These finishing touches transform your entertainment center into a unique work of art.
Why is multimedia integration important?
A well-designed entertainment center should seamlessly integrate modern technology. Ensure your DIY creation accommodates smart TVs, gaming consoles, and soundbars. Concealed wiring and strategically placed outlets contribute to a polished look, eliminating visual clutter.
How do I maintain the longevity of my DIY entertainment center?
Regular maintenance is key to preserving the longevity of your creation. Dust surfaces regularly and use furniture polish for wooden finishes. Promptly clean and dry accidental spills to prevent lasting damage and ensure your DIY entertainment center stands the test of time.
Conclusion
Embarking on the journey of creating a DIY living room entertainment center is a rewarding endeavor that goes beyond the realm of conventional furniture. This comprehensive guide has provided insights into the meticulous planning, precise construction, and thoughtful design considerations necessary for a successful project. By following these steps, you not only craft a functional entertainment center but also a focal point that enhances the overall ambience of your living space.